Gold Ink Guidelines

Stand out from the crowd with print that sparkles.

Captivate your audience by adding metallic features to digitally-printed communications with the Kodak NexPress Gold Solution.

It’s easy to heighten both impact and creativity with the unique printing capabilities available only with Kodak NexPress Digital Production Color Presses.

This guide will walk you through several proven techniques for getting the most out of printing with Kodak NexPress Gold Solution, and provide tips and tricks for how to create your own metallic effects.

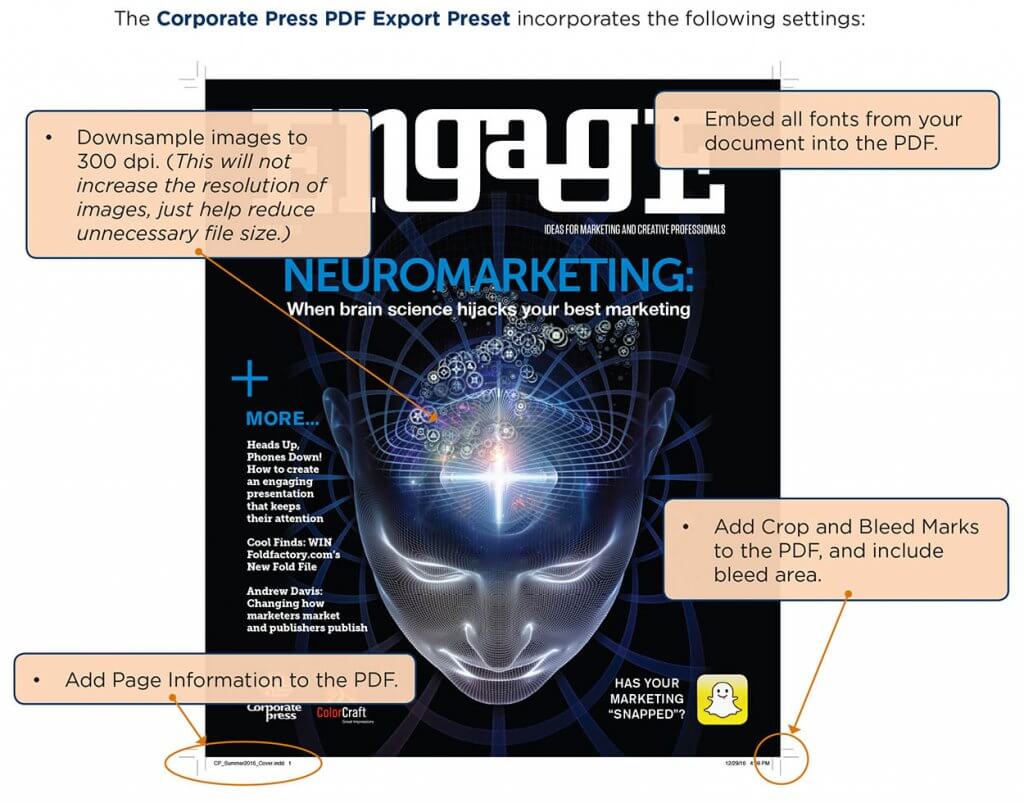
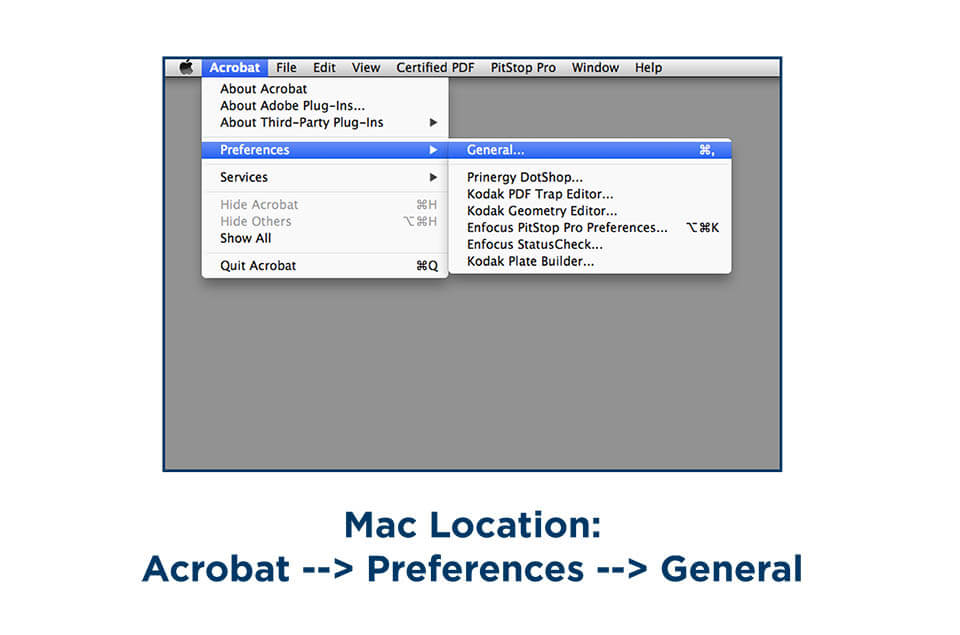
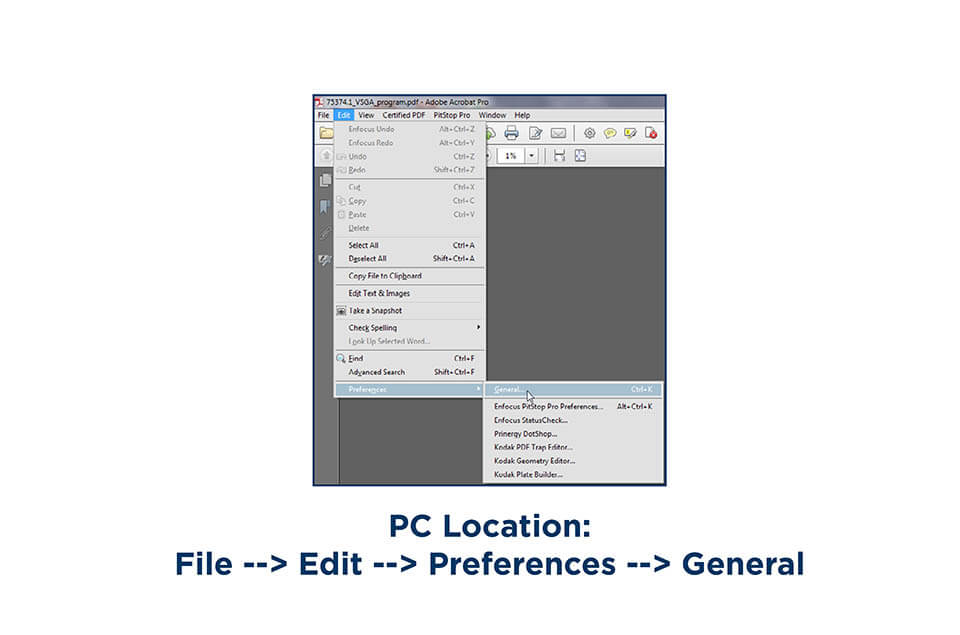
The steps in this guide assume a working knowledge of Adobe Creative Suite, including Adobe Illustrator, Photoshop, InDesign and Acrobat software programs.


PDF Preset Instructions

Creating PDF’s using the Corporate Communications Group PDF Export Preset for InDesign.

The PDF file format is a great way to share documents with others and is one of the most widely accepted document formats available. However, not all PDFs are created equal. When creating a PDF for print production there are a number of settings required to ensure a quality printed piece. We have created a preset you can use to ensure your PDF meets all of these requirements. While this preset will help, it won’t fix an InDesign file that isn’t setup properly.

We have created a guide to show you how to add this preset to InDesign and use it to export your pdf. It’s a very straight-forward process and can be completed in a few minutes. Use the link below to download the preset and the guide.

If you experience any difficulty, please contact our Prepress Department at:
preflight@corporatecommunicationsgroup.com or by calling: 301.324.3644

Dimensional Clear Guidelines

Take printing to a new level

The Kodak NexPress Dimensional Printing System offers the unique ability to create added tactile impact for text, graphics and photos.

It’s easy to expand your creative options using the unique dimensional print capabilities available only from Kodak NexPress Digital Production Color Presses.

This guide will walk you through several proven techniques for getting the most out of dimensional printing, along with tips and tricks for how to create your own individual effects.

The steps in this guide assume a working knowledge of Adobe Illustrator, Photoshop, InDesign and Acrobat Software Programs.

Viewing Softproofs

Steps to Ensure Your Softproof Displays Correctly

In order to view your Softproof correctly, you first step should be using Adobe Acrobat, or Adobe Acrobat Reader to view your PDF. (You can download Acrobat Reader for free here.)

Your file will not display overprints and trapping properly
when viewed in a web browser.

You must also change Acrobat’s default settings for Overprint Preview. These settings will allow you to see objects set to overprint on your screen the same way that they will print.


What are Overprints?

The objects in Figure 1 overlap, but are not set to overprint so the objects on top block the objects below. In Figure 2, the same objects are set to overprint and reveal the objects below.
If your Overprint Preview settings are not correct, you may see Figure 1 in your softproof, but the object will print as seen in Figure 2.

When white type is set to overprint on a background color, the white type disappears because
the background color shows through. White elements should never be set to overprint. This error is only visible when your overprint preferences are setup correctly.

How to Change Your Overprint Preview Settings in Acrobat

Open Acrobat and navigate to the Preferences section.


Your settings should be correct now and your softproofs will now display properly.
You can check your settings by downloading the PDF version of this document.